
The LDD Directory Import extension allows a user to import listings into their directory via CSV file. CSV files can be conveniently edited in programs such as Microsoft Excel and allow you to create, update and edit multiple listing entries in one file.
Key Improvements to the LDD Directory Imports Add-on
In v1.0, we’ve greatly improved the process for importing your listings into your directory and added support for some key features to make managing your import much easier.
- First of all, we’ve added support for mapping tags. Currently the LDD Directory Lite plugin users tags as the main way to signify whether a listing should be “Featured” on your directory home page. This is done by simply adding the tag “featured” to your listing.
- We’ve also added support for defining the listings author which allows you to set which user has access to edit and modify the listings from the front-end if you have allowed public submissions. This field supports username, ID or email. If the add-on does not find a match for this field it will attempt to create a new user account. If left blank or not included the listing will default to the current default WordPress user.
- In order to improve control of your directory SEO, we’ve added support for defining your listings slug.
- Finally, we’ve made some major improvements to how the LDD Directory Imports add-on maps other post specific fields, and included improved sample csv files for your convenience.
How the LDD Directory Import add-on works
The import is an easy three step process, allowing you to specify whether all listings are to be imported, only new listings are imported, or to import and update existing listings. This will simplify the process greatly for large directories that maintain their own information, or easing the process for new sites populating with their initial information.
Step 1.a: Prepare your CSV file
We’ve included two sample files in the download for the LDD Directory Imports add-on (ldd-import-sample-1, and ldd-import-sample-2). Sample 1 is a basic import file with just the main LDD Directory Lite fields and a couple of dummy listings data for reference. Sample 2 contains all the supported import fields as well as a couple of sample listings for reference.
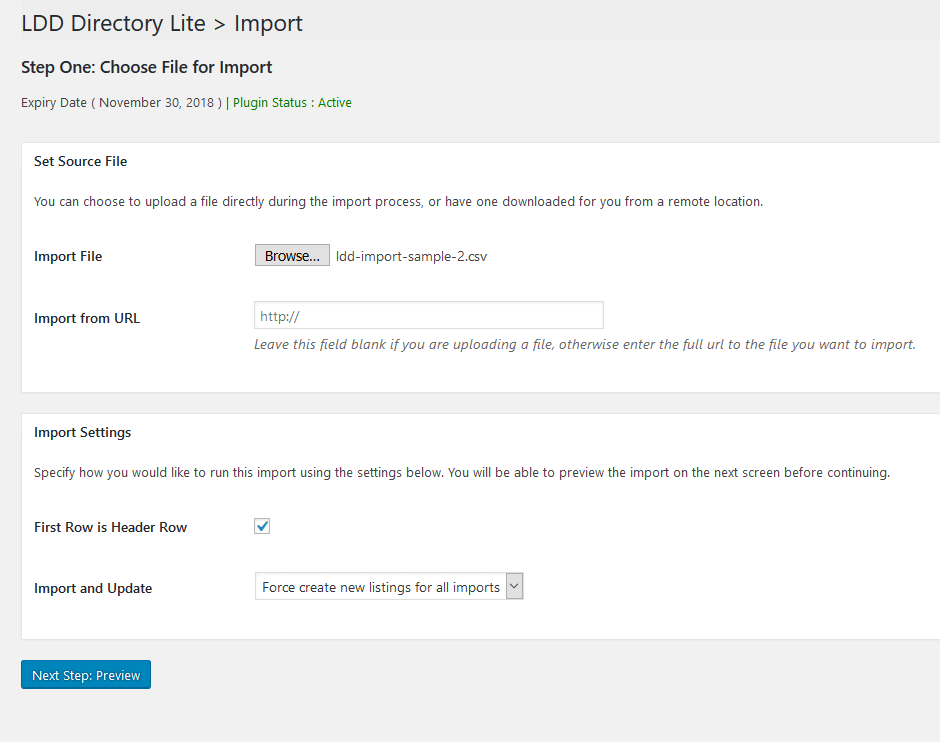
Step 1.b: Upload your CSV file and choose your settings.
Once you’ve installed the add-on, navigate from your WordPress Dashboard to Directory >> Import. Here you will be able to select the file you wish to upload. You may then indicate if your CSV file has a Header Row and select how you wish to handle the import from four different options:
- Import new listings only
- Import new and update existing listings
- Update existing listings only
- Force create new listings for all imports
(NOTE: The LDD Directory Import add-on uses the listing title field to determine if an imported listing matches an existing one.)
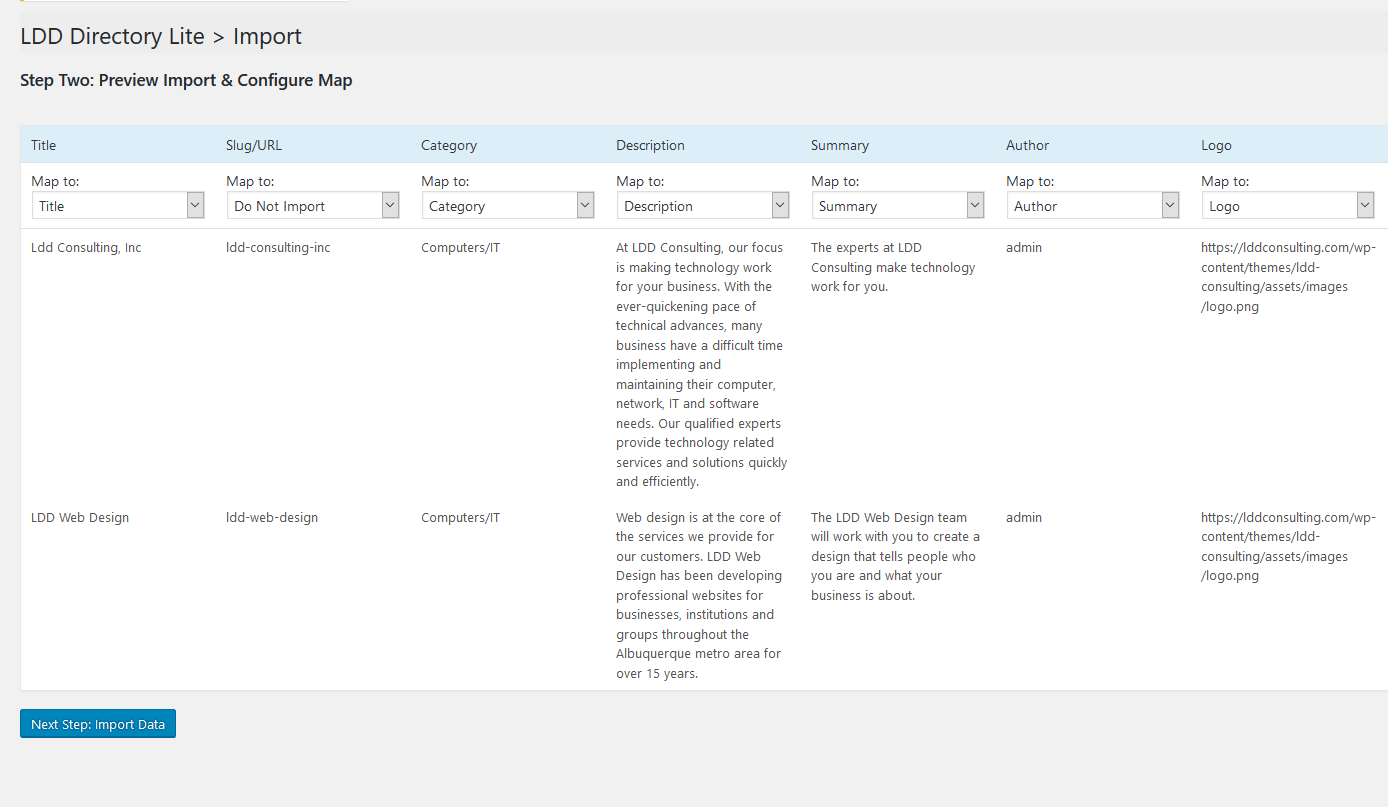
Step 2: Preview Import & Configure Map
In this step of the import process you can directly map the columns from your CSV file to specific listing fields, ensuring that you have more flexibility in how you set up your import file. The LDD Directory Import add-on will attempt to map these columns for you if you have indicated that you’ve included a Header Row in your CSV file from the first step.
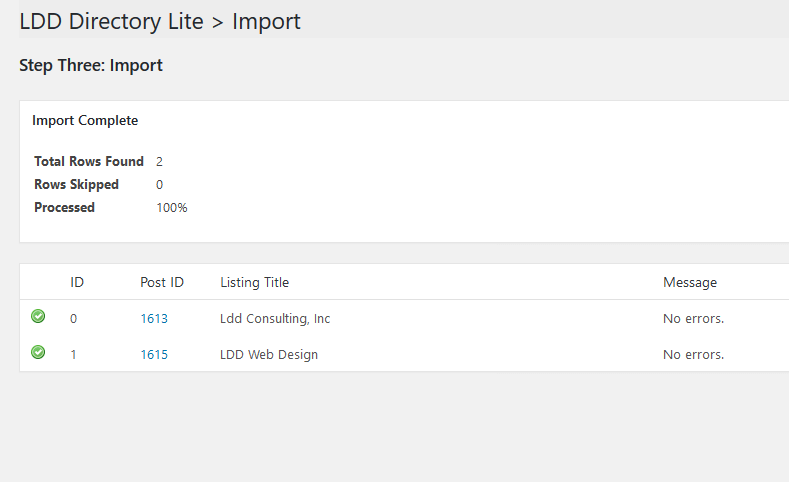
Step 3: Run the import
The last step runs the actual import and provides real time feedback on each listing as they are imported.
If you’re looking for a great plugin to add a directory to your WordPress blog or website, the LDD Directory Lite plugin is a perfect choice. And with the LDD Directory Import add-on you can easily bulk edit, update and add listings to your directory.
Add Your Review